Showing posts with label Food Love. Show all posts

BABY, IT'S COLD OUTSIDE.


See? So much cold, and so much snow.


So I made some soup.
I recommend it. It fights cold.

FALL: Food favourites.


This weekend was the first true fall weekend of the year- a full day of rain Saturday, and it was so cold you needed gloves on Sunday. I turned to food for comfort...

For dinner, I enjoyed this recipe of Sweet Potato Fries. They came out pretty dark so next time I'll reduce the cooking time a little bit before flipping them over.
I also prepared a garlic veggie/pasta dish with carrots and zucchini, which is pretty classic comfort food for me.
For dessert, I baked this Pumpkin loaf that I found on Pinterest.  I couldn't use a loaf pan because I didn't have one, so it's more like a cake... But it's pretty freakin' awesome. Perfect for accompanying my pumpkin chai tea from David's tea (my absolute favourite tea right now).

Like I said, fall is in the air. And I can't help but enjoy all the comfort food coming my way.
What food makes you think of fall?

Chocolate bark.

As Christmas creeps up, I figure I should do something nice for my bosses at work. I didn't really want to buy them anything (who knows what to get them?), so I decided to turn to junk food. Chocolate bark, to be more specific.

Chocolate bark is pretty. It's fun and fancy, and pretty hard to screw up. 

Sweet. Right up my ally.

First, I chopped up the chocolate. 


Second, I melted the chocolate. I boiled a pot of water on the stove and held the other pot with chocolate overtop of the boiling water. I don't have one of those fancy devices, so I improvised.


Third, I poured the melted chocolate into pans and added the toppings.


...Then I stuck them in the fridge to cool.

One finger blister and a sore arm later, I've got three different kinds of chocolate bark that I'll split between my two co-workers.

Semi-sweet chocolate + marshmallows + toffee bits drizzled in bittersweet chocolate

Semi-sweet chocolate + almond slivers + dried cranberries

White chocolate + crushed candy canes + bittersweet chocolate

Lessons learned? 
- Chopping chocolate sucks. 
- Bittersweet chocolate is really bitter, so maybe use less next time. It's a good thing they like a dark chocolate..
- Need to come up with a good way to get them OUT of the pans..
- Make twice as much so you can enjoy some too.

Happy Holidays :)

Food Love: Candy Cane Christmas Cookies

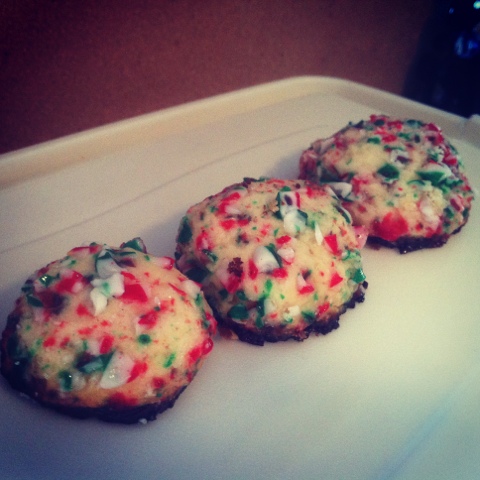
I'm sure many of you have been busy baking up a wonderful Christmas-y storm of cookies! I know I have been! I made these candy cane covered cookies for a cookie exchange that I went to. They were yummy, and as usual weren't my own recipe. I found the recipe here.. They just look kinda burnt because my oven is crazy and likes to overheat without warning... Not my fault...


What you'll need:
1 cup softened butter
1 cup powdered sugar
1 egg
1/2 tsp peppermint extract
1/2 tsp vanilla extract
2 1/2 cups flour
1/4 tsp salt
1 cup crushed candy canes
3 tbsp granulated sugar

Directions:
1. In a large bowl, cream butter and powdered sugar until light and fluffy using an electric beater (medium speed).

2. Add the egg and peppermint and vanilla extracts and beat until well blended.

3. Gradually add the flour and salt; mix well.

4. Cover the bowl tightly with plastic wrap and chill for 1 hour.

5. In a shallow bowl, combine crushed candy canes and granulated sugar; mix well.

6. After the hour's up, pre-heat the oven to 375 degrees F...

7. Shape the chilled dough into 1-inch balls and then roll each ball in the candy can mixture; place on baking sheets and bake for 10 to 12 minutes or until browned.

8. Immediately remove from the baking sheets and place on wire racks to cool.

Food Love: Chicken Souvlaki on an Open Pita

Here's the deal guys, I've been horrible with recipe posts. I don't think I've done one for about 4 months now. Most of you probably don't even know that I ever did them!

But I found one, stashed away in my files, that I forgot to post from the summer.  It's a recipe for Chicken Souvlaki on an open pita. It was SOO yummy! I didn't come up with it, it came from the Milk Calendar for 2009. Read on, or check out the link to learn how to make some of this yummy goodness!


You will need:
1 tbsp. butter
2 cloves of garlic, minced
1 tsp dried oregano
Salt & Pepper
1 onion, halved and thinly sliced
1 lb. boneless skinless chicken, cut into 1-inch pieces
2 tbsp. all-purpose flour
1 & 1/2 cups of milk
Grated zest of 1 lemon
Whole wheat pitas (8 small or four large)
1 cup diced English Cucumber
1/2 cup plain yogurt (I substituted Greek Yogurt to keep it a little thicker)
2 tomatoes, chopped

Directions
1. In a large skillet, melt butter over medium-high heat.  Add garlic, onion, oregano, 1/2 tsp salt and 1/4 tsp pepper and sauté for about 3 mins until softened and starting to brown. Add chicken and sauté for about 5 minutes or until lightly brown.

2. Whisk flour into milk and whisk into skillet; stir in lemon zest. Cook, stirring often, for about 5 minutes until sauce is thickened and chicken is no longer pink inside.  --> This step took me longer than 5 minutes, I found that for the sauce to thicken, it took closer to 15 minutes.

3. Meanwhile, toast or heat pitas. In a bowl, combine cucmber and yogurt**. Spoon chicken and sauce onto top of pitas, dollop with cucumber yogurt and sprinkle with tomatoes. 

How I customized the recipe: 
**Instead of just doing a cucumber-yogurt sauce, I googled how to make Tzatziki sauce and went with that.  If you plan to do something like this, you'll need to start dinner a little in advance because it takes a while to drain the cucumber.  I will post the recipe I used for the sauce below.

------------------------------

Tzatziki Sauce Recipe
1 container plain Greek yogurt
1 cucumber
1 tablespoon olive oil
1/4 lemon, juiced and zest
1 & 1/2 tsp chopped fresh dill
1 & 1/2 cloves garlic, peeled
Salt & pepper to taste

Directions
1. If you are not using Greek Yogurt, follow this first step: The night before, place yogurt in a paper towel-lined strainer over another bowl and leave in the fridge overnight.  It will drain some of the yogurt and you want to be left with a thicker yogurt-like consistency for the sauce.  


2. Peel, seed and cut the cucumber, and place the pieces in a strainer over a bowl. Cover with salt.  The salt takes the water from the cucumber and drains it for you.  This will make sure your sauce doesn't get too watery. This step was the most challenging, in my opinion =). 

3. In a food processor or blender, combine all ingredients. Process until they are mixed and the sauce is smooth.

4. Transfer the sauce to a separate dish and cover & refrigerate for at least an hour.

ENJOY!!!

Food Love: Shell Pasta with Cheesy-Tomato Sauce and Sausages

Hello everyone!

I haven't done a recipe post in a while, and this is one of my favourites! My mom used to make this all the time when I was younger. She got it from a Milk calendar back in the day... Anyway, I use her recipe, but I've adapted it a bit to fit mine and my boyfriend's tastes.  See, she likes it cheesy, and we like it tomato-ey :)

What you need: 
2 tbsp. of Butter (we use margarine)
1/2 cup chopped onion
2 tbsp flour
2 cups milk 
1 1/2 cups of cheese (shredded). Old is recommended but we use medium.
4-5 Italian sausages cooked, sliced
2 tbsp. tomato paste (we put more, we like the tomato flavour)
1 tbsp. chopped parsley (we never put this in, we don't have parsley...)
Cooked Pasta (not sure how much, we eyeball it... but the sauce will usually serve 4-5). We have always used shell pasta.

Sometimes we reduce the milk amount to 1 1/2 cups or increase the cheese amount to 2 cups, to make the sauce a little thicker.  There's lots of room to play :)


There are two ways to cook the recipe. We have always used the microwave directions because they are a little faster, and allow you to do other things without watching the food.  But I will give you the stove-top recipe as well. You'll probably need a decent sized sauce-pan...


Microwave Directions:
1. Combine butter and onion in microwave safe bowl.  Cover with vented plastic-wrap and cook on high for 2 - 3 minutes until onion is tender.
2. Blend in flour, and stir milk gradually.
3. Microwave on high for 4-5 minutes, stirring every minute or so to ensure the entire mixture thickens.  Once the mixture boils or thickens, it's ready for the cheese!
4. Add cheese and stir until melted.  Stir in tomato paste and parsley.  Sometimes the sauce cools down, and you may have to microwave for another few minutes to warm it up. Just don't let it boil.
5. Add sliced, cooked sausages to the mixture.  Stir and serve over cooked pasta!

And VOILÀ!


Stovetop directions
1. Melt butter in medium sauce-pan; sauté onion until tender.
2. Blend in flour and gradually stir in milk.  Cook and stir over medium heat until mixture boils and thickens. Remove heat.
3. Add cheese; stir until melted. Stir in cooked, sliced sausage, tomato paste and parsley.  Reheat if necessary, but be careful not to boil it.
4. Serve over hot cooked pasta.

Food Love: Peanut Butter & Chocolate Chip Cookies

If you like peanut butter, and you like chocolate, and you like cookies, then you'll PROBABLY like this recipe for Peanut Butter & Chocolate Chip Cookies. :)

The boyfriend told me they are his favourite cookies I've made so far, but don't be fooled. I've only made 2 other kinds of cookies: regular chocolate chip, and plain peanut butter. Clearly I'm not very fancy, since this is a combination of the two... But it IS a different recipe.

You will need: 
1/2 cup unsalted butter
1/2 cup peanut butter (smooth or chunky depending on consistency you desire)
1 cup packed brown sugar
1 large egg
1 tsp. vanilla extract
1 cup flour
1/2 tsp. baking soda
1/2 cup semisweet chocolate chips


Instructions: 
1. Heat oven to 350 degrees.

2. In a mixing bowl, mix together butter, peanut butter and brown sugar until smooth.  Add egg and vanilla and mix.

3. In a second bowl, mix flour and baking soda.  Add to the mixture in the first bowl and mix. Stir in chocolate chips.

4. Place spoon-fuls of cookie batter onto baking sheets 2 inches apart.  Bake approximately 18 minutes (I always like to keep an eye on them just in case).  Once they're done, transfer to a wire-rack to cool.


FYI: I doubled this recipe and it made about 3-dozen average sized cookies. But I guess that depends on your definition of 'average sized cookie'... :)

Food Love: Homemade Pesto & Peppers with Pasta

Hello lovelies,

Do you ever feel like you've fallen into a rut with the dinners you make? This often happens to me, so to get myself out of the rut, I try and make something new once a week or so.

This week, I made a recipe from the book Eat, Shrink and Be Merry. In the book, the recipe is called "Touched by an Angel Hair Pasta", but I don't have angel hair pasta... Sooo I just call it homemade pesto & peppers with pasta.

What you will need: 
2 red bell peppers
1 orange bell pepper
1 yellow bell pepper
1 1/2 cups fresh basil leaves
2 tbsp olive oil
2 tsp minced garlic
1/2 tsp salt
pasta of choice (they use angel hair, I used whole wheat spaghettini)
1/4 cup Parmesan cheese
Black pepper (optional)

Step 1: Preheat broiler.  Halve each pepper and remove the stem & seeds. Place peppers cut-side down on baking sheet. Broil until the peppers are blistered and charred (I think mine were in about 10 minutes?).  Remove from oven and transfer to a large bowl.  Cover bowl with plastic wrap. Let them sit for 15 minutes.

Food Love: Yummy Nacho Dip

Good afternoon lovelies!

Today's post is food related, because I love food. Don't you?  My boyfriend and I are lacking "snack" food in our house, so we went to the grocery store and got makings for an amazing nacho dip!


What you'll need:
1 cup sour cream
1 cup cream cheese (whole little container)
1/4 cup Miracle Whip
1 packet of Knorrs Vegetable Soup Mix (label got cut off in photo)
Salsa (any kind)
Cheese (any kind, we use Marble)
Green onion (or other veggies if you'd like)
Don't forget nacho chips so you can ACTUALLY eat it
...And no, of COURSE I've never done this...

First, mix the cream cheese, sour cream, Miracle Whip, and the vegetable soup mix.  Mix it well.

Pour into a large container (I used a glass pie plate/container/thing seen below).  Spread evenly.  Top with salsa, and spread evenly.  Add green onions as desired.  Shred and add cheese.

Serve and chow down!


Obviously we couldn't help ourselves.

p.s. You can store this in the fridge for a couple days, covered with plastic wrap or aluminium foil. It stays just as good!

Food Love: Ice Cream filled Crepes

Hi everyone!

A huge love of my life is food. Recently I mentioned crepes in my blog, but I've found a new way to enjoy them. It's quite simple, and requires just a few steps and ingredients. 

Ice Cream filled Crepes!
(yes... I really did JUST discover them...)

What you need:
  1. Crepes
  2. Nutella (or other 'sauce' of choice)
  3. Ice cream (whatever kind you want)
I made the crepes ahead of time, using a recipe off Youtube.  It's pretty good, but I needed to add a bit more milk to make the mixture a little runnier. Also, I didn't wait the "1 hour" that they suggest, I wanted my crepes right then and there!

Once you've got your crepes...

1. Start off with a fresh warm crepe.
2. Add your Nutella, or sauce of choice (however much you want!) to the crepe.  Spread it on the crepe.


3. Add your ice cream.  This time I'm using Pralines and Cream, but I would normally have chosen vanilla.


3. Roll up your crepe by rolling the ends inwards, and then fold over the sides. If you can do this quick enough, the warm crepe will start to melt a bit of the ice cream... YUM!

It's as simple as that! Now, you're ready to enjoy your lovely snack: